How to set up your very own AND!XOR Chomper hacker smartwatch
Every summer in Las Vegas, hackers from all over the world come to the strip to hack the planet at the largest hacking conference, DEFCON. The AND!XOR group has been building wearable technology badges in tandem with the conference and selling/giving them away at the conference since 2016. DEFCON 30 was no exception, their awesome badge named "Chomper" was in the works for roughly two years before its release last month. The badge was orginally slated for DEFCON 29, but the global supply chain issues which were impacting almost everything that year elongated the timeline. In short, their plan was to buy consumer hardware, hack it, build drivers from the ground up for an embedded version of Python, load it with hacking tools, and a fun text-based adventure. Amazing.

Check out the AND!XOR DC30 Trailer to see their craftmanship
If you didn't make it to DEFCON this year, or if you were so busy (guilty here!) that you didn't have time to check out the AND!XOR "snacky" CFT/vending machine, you're in luck. AND!XOR released the source code and I'm going to show you exactly how to configure your own Chomper. It's actually pretty easy. :-)
First things first, you need to buy the watch. It's a LILYGO T-Watch-2020 V3. It's basically an ESP32 with a screen, microphone, Bluetooth, Wi-Fi device shoved into a smartwatch formfactor. If you'd like to support this blog, you can buy it from amazon here: https://amzn.to/3KNDjeh.

Who exactly is this Lily? Why does she go?
So, get to ordering it! Don't worry, we'll be here when you get back. :-)
Alright, got the watch? Awesome. :-) Now you'll need to set up your flashing environment. Now I suggest that you set this up using your favorite Linux environment, while I'm sure you could set this up in Windows I just think it'd be a lot of work/heartache. For me I'm going to run Ubuntu in VMWare Workstation with a fresh install of Ubuntu.
NOTE:
If you're just finding it a little too challenging to set up this environment - I understand, not everyone is familiar with Linux. At the very end of this post, we exported the virtual machine used to do the flashing so you can just download and flash - but don't forget to set up the Wi-Fi access point "Matt Damon" explained later in this post.
Let's start by installing the basics, git, python3, etc.
sudo apt-get update
sudo apt-get install python3 python3-pip git

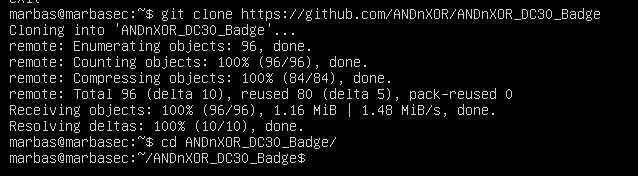
Once that's installed, we'll grab the AND!XOR badge firmware/flashing stuff from their github using the following command:
git clone https://github.com/ANDnXOR/ANDnXOR_DC30_Badge
cd ANDnXOR_DC30_Badge
Following the guidance from the software repository, we'll need to just do some additional configuration steps to set up user accounts, set up permissions, and install some more packages. Let's get to it.
Setup the user's permissions so we can flash the watch without sudo
sudo adduser $USER dialout
The documentation says that we need to break the serial device permissions as well. Not sure why - but let's do it. :-)
sudo apt remove modemmanager
Now we're going to need to install a whole bunch of packages, this will take a minute.
apt install build-essential python3-virtualenv python3-freetype ffmpeg picocom
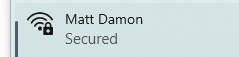
Actually - since we have a few minutes while that's running, we're going to need to set up a WiFi access point for our watch, so maybe do that now. The watch downloads most of the assets right from the internet, mostly because it would be horribly slow over a serial connection. The WiFi access point must be called "Matt Damon", and the password must be "WEmustSAVEhim".
What will the neighbors think?
AND!XOR really likes Matt Damon if you didn't already know. :-) Hopefully that took up some time and our build environment is done and ready to go.
Now we'll need to add an alias for our python3 install.
sudo update-alternatives --install /usr/bin/python python /usr/bin/python3 1

Now we'll need to set up our python packages for this whole thing to work with putting the python stuff on the watch.
pip3 install adafruit-ampy mpremote cmake
You might run into the following error (which we'll want to fix) when you install these packages.

Basically, we need to make sure we can access the new python packages from the command line. To do this, edit your /etc/environments file. Let's do that now - I'm going to use vi, but you do you when it comes to text editing.
sudo vi /etc/environments
We'll need to add the path which was in the error message. Once that's in there, save the file.

Now we'll need to just have our session pull those attributes, the best way to do this is just to log out, then log back in. Once you're back in just check to see if the new path is in your PATH variable with this:
echo $PATH

Cool! Let's go back into our AND!XOR file where all the code is.
cd ANDnXOR_DC30_Badge/
We now need to grab the ESP IDF, now in the documentation they say you need the 4.2 version, so we'll clone that repository, and then change into that directory... this will take a little while, lots to clone here. :-)
git clone -b v4.2 --recursive https://github.com/espressif/esp-idf.git
cd esp-idf

Once you're there, time to install the xtensa build tools using the esp-idf install script.
./install.sh
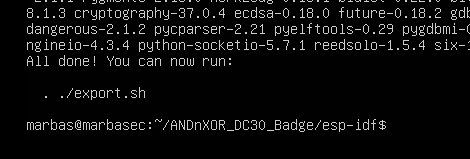
Now, it's not mentioned in the github readme, but you'll also need to do this export step which is shown in the terminal after installing the xtensa tools. Do that now.
. ./export.sh

Now, we should be able to rock and roll with this thing. We'll need to now attach our watch and route the USB connection to our VM, and then find out which serial device it's named. To do this, just list the directories in /dev and look for tty device named ttyACM - in this case for me, it's ttyACM0

Let's try flashing the device. If you skipped setting up that Wi-Fi access point, do that now! Back in our provision script location inside /ANDnXOR_DC30_Badge/provision, we'll want to run the provisioning script with that tty device as an argument.
./provision.sh /dev/ttyACM0
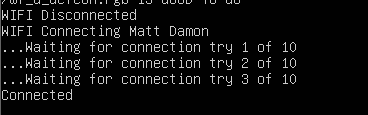
If all is good, you should start seeing some mpy files being flashed over (slowly - according to the script).
This will take a bit of time. The script is going to instruct the watch to connect to your Matt Damon Wi-Fi, and will start downloading files from "mattdamon.app". :-)

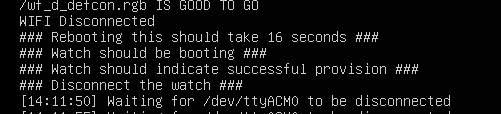
Once it's done, it'll be ready to disconnect - however, check the watch screen, it should be red, yellow, or green which is indicating if the device is properly charged. As heard in the microfab podcast (link below), at the flash party for these devices, they would leave them plugged in until they turned green to indicate the watch was charged.

Yay!! It's ready.
Now, go forth and conquer the world with your new hacker smartwatch! Enjoy the lolz, puzzles, 31337 timepiece, and hard work from AND!XOR's very talented and creative team.

Till next time.
-Marbaṩ
References & Resources
Podcast on how this badge was created: MEP EP#342: Hackery Experts - MacroFab
AND!XOR's website: HOME | andnxor
AND!XOR Software/Firmware for DC30 Badge: ANDnXOR/ANDnXOR_DC30_Badge: Chomper! (github.com)
Preconfigured VM: https://www.dropbox.com/s/erp993xm33kn1d8/ChomperFlashVM.zip?dl=0